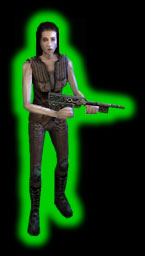
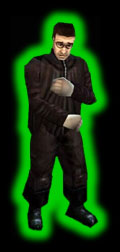
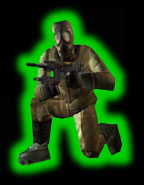
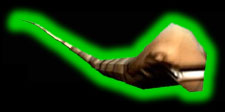
Specialty weapon: electric gun.
Appropriately enough, you will spend most of your time playing as the movie's lead character (and you begin and end the game with Ripley as well.) Although the amount of territory you cover with her--7 out of 10 levels--allows you to build up quite a reserve of ammunition, be prepared to be severely disappointed in this respect when you hit Level 9!
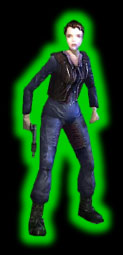
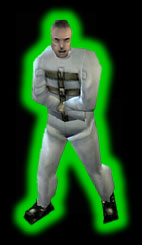
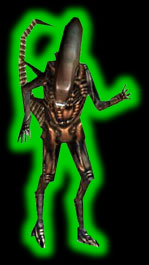
Specialty weapon: laser.
The auton alone wields what may be the best weapon in the entire game--the laser. Although its effect on the queen and newborn is unknown (you never face them as her), this gun mows down other enemies with ease. Call is the first character to come pre-equipped with the motion tracker.
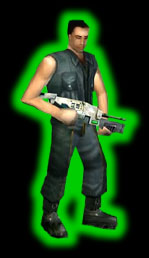
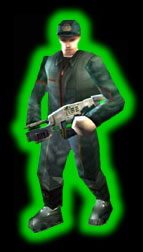
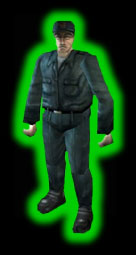
Specialty weapon: none.
This soldier-come-rescuer is the only character without his own unique weapon. However, with access to a motion tracker, pulse rifle, and grenade launcher, he certainly does not come up short!
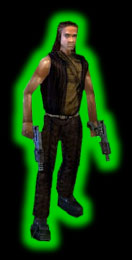
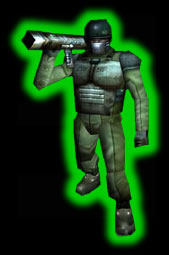
Specialty weapons: dual pistols and rocket launcher.
Christie, like the other 2 non-lead characters, only plays a role in a single level. However, his level is easily the largest in the game. Christie is also the only character to boast 2 exclusive guns. The dual pistols would have been a godsend earlier in the game when the learning curve was still steep, but they nevertheless do nicely in Level 8. Learn to use them effectively, and you can save a great deal of ammunition for your more potent guns. The rocket launcher may be the most fun weapon in the game (even though it's not the most effective), and while the "kitchen swim" was faithfully recreated, this gun made me actually wish for more underwater alien encounters than the game offered!

While some movie enthusiasts might debate this character's inclusion under the "Good" list, he's one of the few individuals in the game that surrenders a passcard willingly. That's "Good" enough for me!
This unfortunate soul has about a 90-second lifespan in the game. However, if you manage to keep him safe from the marauding aliens (and can also avoid bumping into him while doing so), he will survive long enough to open one of the very few secrets in the game to reveal a large health pack, a portable autodoc unit, and that rarest of all commodities, a precious save point! At this juncture in the game, a chestburster hustles him off to the hereafter, but even in death Purvis is kind enough to leave a passcard behind.
Patients infected by facehuggers do not actually represent a direct threat. However, aliens seem to be interested in protecting their unborn brethren, and euthanizing a patient often results in the immediate appearance of an alien or two, often at very close range! It's up to you to decide whether to be merciful or not--killing or bypassing patients seems to have little effect on the outcome of the game.
Despite the official picture above and in the game manual, marines come equipped only with the pistol. While certainly less threatening than an alien, they do have the ability to inflict damage at long range. However, a single shot to the head with your own pistol will permanently stop one.
These are "Most Annoying Enemy #2" because of their ability to inflict HEAVY damage from long range almost before you can react (stay tuned for "#1" below). Generally, more challenging enemies pop up later on in a game rather than earlier. However, these tough hombres show their ugly mugs well before the hazmat marines and they are not only far tougher, but also tote a much deadlier arsenal. Their aim ranges from "near-miss" to "dead-on", and they will attack with pulse rifles or grenade launchers. I actually found the grenade-equipped version to be less deadly because I could sometimes take them out from beyond the range of that weapon. Since they are wearing body armor, be aware that in a full-out fight they can knock your health down more than twice as fast as you can theirs. In fact, on the HARD difficulty setting, one of these boys can terminate you handily in under 1 second! Use the pulse rifle and aim for the head--it probably matters more with these guys than with any other stock enemy in the game! These men will make that difficult with their running, rolling, and dodging techniques, though. Unfortunately, you can't take their body armor with you after they no longer have a need for it!
Compared to the spec ops marines, these guys are a piece of cake. They go down faster and their flamethrowers have a laughably limited range (although you'll be sorry if you let one get too close!). Unless you get caught in tight quarters, you can often take these down with the pistol before they can get within firing range. Otherwise, use the pulse rifle.
The General is hands-down the toughest human opponent in the game, equivalent to 2 or 3 spec ops boys as far as armor goes and just as deadly, if not deadlier, weapons-wise. If you haven't been concentrating on head shots before, start right now! Also be aware that, like any commanding officer, Perez does not enter battle alone . . . the pulse rifle will do well for this toughest human encounter.
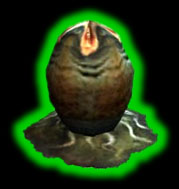
While eggs aren't the first alien enemies you'll encounter, we'll list the xenomorphs in order of development for the sake of orderliness. These "enemies" aren't in themselves dangerous, but they will disgorge a facehugger when approached. In tight quarters, you can tell that a 'hugger is about to make an appearance when you hear the egg emit a distinct "hiss-hiss". At close range, the shotgun is by far the best gun to use, even though eggs take just as many shots (2) as a fully-developed alien. At longer ranges the pistol does well, but make sure that you aim at the base of the pod so that you are lined up for the kill when the facehugger emerges (as it will 95% of the time). It will take 13 rounds to destroy an egg containing a 'hugger. However, you should reload well before your clip is used up, as the facehuggers have a nasty habit of emerging before the egg is destroyed, but just as your clip is nearing empty! This is alleviated by Christie's dual pistols when you get to play him.
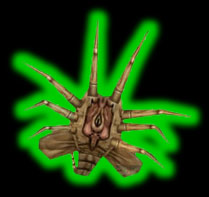
This is it--"Most Annoying Enemy #1"! Let me grab my soapbox . . . okay, here we go! These little dudes sit around all day, hiding in small recesses and dark corners just waiting for you to wander by. There are a number of areas in the game where you WILL get facehugged the first time through that part of the level. Only after learning precisely where certain 'huggers emerge will you be able to avoid them. That said, it is still possible to complete the entire game without putting a single facehugging on your memory card. However, that doesn't stop these beasties from finding other ways to be extremely annoying! They are often encountered in groups, and a common tactic (deliberate or not, I don't know) is for a live facehugger to run up to a just-killed companion and stop there. If you shoot at them, you will ALWAYS hit the dead facehugger. Only after you have blown away the dead one can you start working on the live half of the pair, but live 'huggers will rarely stay still long enough for that. The same goes for huggers that take refuge near human or alien corpses. Also be aware that these critters are fully capable of running unperturbed through a continuos, non-stop stream of dual pistol, pulse rifle, or even flamethrower fire in order to give you a nice big hug! I have also had these little beasties jump from BEHIND me and still succeed in wrapping themselves around my mug, and was also once 'hugged while on a ladder by a facehugger that performed a standing vertical jump of over 10 scale feet! And before putting away my soapbox, let me point out that these creatures can jump with even more amazing distance and accuracy: I once got facehugged from across an entire room, at an estimated in-game scale distance of 30 feet! Unfortunately, aiming down with a weapon seems to be the best way to get 'hugged, even if it is the only way to kill a facehugger. The flamethrower is THE undisputed weapon for these enemies, with the shotgun a close second. For longer-range work, the pistol (and especially the dual pistols) do quite nicely. Facehuggers will take 3 pistol rounds before going down, or a single shot or burst from most other guns. 'Huggers move quickly, and the best time to hit one is just after it emerges from an egg or during the short rest it takes following a jump. On the HARD difficulty setting, facehuggers tend to start moving immediately upon emerging from eggs, and it sometimes helps to back up as soon as the creature ejects itself in order to keep it in your sights as it advances toward you. Similarly, at moderate ranges (and at any difficulty setting) it is sometimes quicker to move forward or backward slightly rather than looking (= aiming) up or down to line up on a moving or recently-halted 'hugger. If you're facing a crowd but don't have a flamethrower handy, the pulse rifle is the weapon to be holding. Unseen facehuggers often announce their presence by the "swish-swish" of their whipping tail, and this is often the only warning you get (if any). At close range, you might hear the quick scuttling sound they make just before they jump you. Be aware that facehuggers will often "play dead" after being shot, only to pop up and come after you shortly thereafter. This is especially true when using the flamethrower, but does not seem to apply to the electric gun. Try to use the pistol to make sure "dead" facehuggers are really dead to save ammo, even if it means going to the trouble of switching from the weapon that first knocked the 'hugger on its back.
The chestburster is not actually an enemy within Alien Resurrection unless you count the embryo left behind following a facehugging. Quick activation (you'll have just over 1 minute) of a portable autodoc unit will eliminate this problem. You might catch a glimpse of one leaving the body of a hapless patient or Purvis--or even yourself if you fall just right!
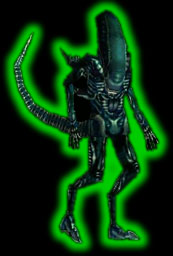
(Equivalent to "Warrior" or "Warrior Alien" in most other games)
If there's one thing that truly infuriates an alien, it's activating a critical switch or placing your grubby mitts on a particularly nifty pickup. Even killing the queen mother herself won't cause aliens to come popping out of ceiling vents or pouring around corners the way grabbing a large health pack or particularly important passcard will! You won't be far into the game before you begin automatically backing into pickups and hitting the quick-turn button after activating every switch. Thankfully, the appearance of an alien is usually announced by a loud bang, gunshots, and/or the cry of a soon-to-be-dead human. Since you can hear farther than you can motion-track, this is very helpful. Also keep your ears open for the heavy breathing of awaiting aliens when entering a new room. Be aware, however, that there are a few areas in the game where you absolutely, positively, WILL take damage (depending on how the alien AI reacts) and there is absolutely nothing you can do about it. These situations are quite rare, though, and careful replaying of a particularly tough section will nearly always reveal an escape route or defensive tactic that, if skillfully executed, will allow you to administer justice unscathed. The very best weapon for these creatures is the laser, followed by the pulse rifle. The shotgun is also an excellent choice, especially when the onslaught materializes in close proximity. But for more than 2 attackers, watch that reload time! The shotgun also presents a unique advantage in being able to vaporize a warrior caught by the blast in mid-air, and when a warrior jumps at you this is often the only weapon capable of stopping a full attack. Even a warrior that is apparently stopped several scale feet short of you appears to be able to inflict significant damage merely by jumping at you, and even when other guns kill the beast it may still take a large bite out of your health. While the grenade and rocket launchers are also effective, their use is restricted to long range--discharging these weapons in close quarters will prove deadlier than the aliens you are trying to kill! Reserve these big guns for underwater work and for taking down a group of aliens hanging from the ceiling. You can (rarely) take out several mobile aliens at once with explosive projectiles, but their speed makes it tough. The pistol, and especially the dual pistols, do quite well for singles, doubles, or triples as long as you have enough hallway space for the 6 head shots per alien needed to bring them down. Back up as you shoot to make sure the aliens expire before they reach you. As with the other bipeds, aim for the head. However, with the aliens you can aim significantly higher on the head than you can with human enemies, which often presents a slightly easier target and sometimes appears to be slightly more effective. These enemies do have a nasty tendency of dropping to all fours to continue the attack, however, so be ready to adjust your aim quickly if necessary. Once an alien goes down (via any non-explosive weapon), it may experience death throes. Give such a creature a wide berth until it is fully expired. One especially good reason for doing so is that upon occasion one of the "dead" beasts may pop up off the floor, take a nasty chunk out of your health meter, and then drop down dead without a single additional shot being fired!
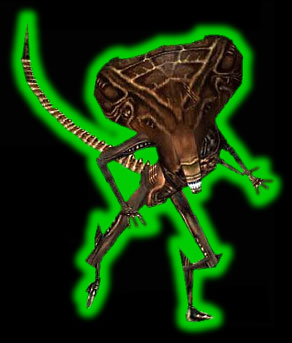
These enemies are quite rare in the game--in fact, you will face the newborn nearly as often as you meet these. Consider soldier aliens to be faster, hardier, and deadlier versions of the alien and you'll have a perfect description. They don't seem to scuttle along walls or ceilings like their less formidable brethren, but this may simply be due to the limited contact you have with these creatures. Stick with the pulse rifle when you catch that glimpse of blue closing on your position!
For many Aliens fans who found themselves disappointed by the newborn, the queen still reigns supreme as the single best alien creature in any movie, ever. Not including a scripted sequence, you will face the queen only once in this game. And, believe it or not, you can take her down using only the pistol! Regardless of the weapon you choose (the pulse rifle would be HiveSeeker's other recommendation), your tactic will be the same. Start at #25 on MAP 4D and run into the hallway leading to #26 (which actually happens to be where you want to go next anyway). There is an intermittent electrical discharge blocking this short hallway, and you will need to time your run so that the discharge goes off and you can enter safely before the queen reaches you. The queen won't follow you in, so you can take your time to watch the electrical discharge and get its timing down. Now you're ready! Equip your weapon of choice and face what would be toward the top of the map (the direction you came from) with your back to the hallway wall (which would be toward the bottom of the map). Now sidestep out of the hallway, timing it so that you won't get shocked. The queen will usually be hanging around near the indicated corner of the map, directly ahead of you. Fire off 5 pistol rounds or a few pulse rifle bursts and then sidestep back into the hallway, once again timing it so that you avoid the electrical current. The timing will be roughly a 5-count; you may need to vary the pistol shots and the count to get your own "rhythm" down. Once you get the "feel" for the pattern, it's actually pretty easy. You will need to stand quite close to the electricity to reduce wasted time sidestepping . . . but not TOO close! No matter which weapon you use, you'll be repeating this very many times! However, when you are finished the queen will be dead, and (if your timing was good!) you won't bear a scratch from the encounter! NOTE: The alien queen moves in a timed pattern, based on how long you take to run to #26 following the scripted video. If the timing is off, the queen will be close enough to reach you before the electricity cycles off and you can safely re-enter the hallway while sidestepping. If this happens, re-load your last saved game (there was a save point not too far back) and try it again. You might want to grab the passcard at #24 and re-save your game (or do so before you save your game on HARD) to avoid repeatedly re-killing the enemies around it. HiveSeeker recommends making your run immediately following the end of the video to time the queen's pattern correctly.

You will face this fiendish human-xenomorph offspring three times during the game, twice on Level 9 followed by the ultimate encounter on Level 10. You can't kill it with weapons, but the electric gun will stun or even knock it down. During the first two encounters on the Auriga, you must avoid the newborn and keep shocking it until it leaves the immediate area. During the final battle on the Betty, you will need to use the electric gun to knock the newborn down repeatedly, allowing yourself time between attacks to turn valves and open doors while you work your way through the ship. This is best accomplished by repeatedly leading the newborn away from the location of your task, then stunning it and going back to complete your work. Since the newborn moves relatively slowly, this allows you to work in more safety than by not leaving the immediate area but having to repeatedly stun the newborn. However, if you are particularly quick, you can work with the xenomorph present and not have to pause too terribly often to knock the creature down.


