![]()
![]()
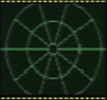
You never see the motion tracker as a pickup since you begin the game with this item already acquired. The tracker is indispensable for locating secret areas, particularly when you haven't found the auto-mapper yet or are on a level where no 'mapper is available. How? It will detect enemies moving around on the other side of secret walls, and even below or above you where lifts are present. This piece of equipment also lets you see when you have activated an enemy (foes don't show up unless they are moving--the sole exceptions are infected humans, which always show up), and also lets you watch disturbed enemies moving around and approaching your location. This last advantage lets you get the drop on humans coming around a corner--you can often blast them before they can get a shot off at you. But watch out--they can sometime shoot around corners and hit you!
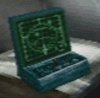
One bummer about picking this up is that you can't tell where you've been and where you haven't when viewing the map, but it does show more detail and will reveal secret doors, crates, and lockers that may contain pickups. For this reason it is well worth grabbing on the timed powerup levels. The amount of detail shown varies quite a bit, however, and on levels containing catwalks or canals the auto-mapper is practically useless in these locations. In addition, some lockers that it shows to be "openable" are not, for some reason. This goody is absent on certain levels, especially within the boneship.
![]()
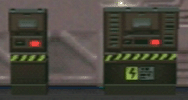
Some require a battery for use, and some activate timed lifts that you will have to run to in order to catch in time.

You'll need these to operate certain switches and lifts, but activate such a lift or switch more often than necessary and you may end up a battery or two short later on. You might actually end up with an extra battery or two on certain levels, but you can't take them with you when you exit.
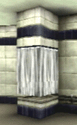
Timed duration: 60 seconds. These will illuminate dark areas but cast a greenish glow that I found annoying at first. To use this visual aid, pause the game, joypad down to it on the list of items, and joypad right to select it; hit START again and your view should be a lot brighter. Unlike most other powerups, you can't carry these with you into the next level, so use them when you find them or lose them. [Note: Not available in SegaTM SaturnTM version of game.]
Timed duration: 90 seconds. Less common than the shoulder lamp and found only in the later stages of the game. These seem to work better than the lamp, but that might be simply because they cast a pleasant blue glow rather than green. If you don't use these in the level in which they are found, they disappear from your inventory when you start the next level. Activate in the same manner as shoulder lamps. [Note: Not available in SegaTM SaturnTM version of game.]

These don't give you anything except a 100% on the MISSION ASSESSMENT screen. Found in lockers, human enemies, infected humans, cryotubes, or just lying around.
Blow with any weapon or by exploding an adjacent barrel (see BARREL below). May contain pickups or a facehugger. These can also form a protective barricade from which you can dispatch aliens lurking on the other side. Barricades may also include barrels, adding to their uses as protective barriers (see BARREL below).
![]()
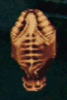
Blow with any weapon. Pickups, facehugger, or chestburster. There are two styles, and the second is found only on Level 141 (GARAGE). Sometimes lockers containing powerups are visibly different (darker, for example) than their neighbors, but usually they look identical.
Blow with any weapon. Found only on Level 131 (MED. LAB). Facehugger or derm patch.
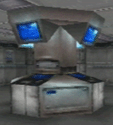
You will only encounter these on a couple levels. Open by activating the control panel at the foot of each tube. Chestburster or pickups.
Blow with any weapon. You'll only see these on Level 211 (LIVING AREA). Facehugger.
Blow with any weapon. These seem to contain only derm patches.
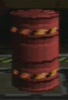
Blow with any weapon but the pistol. These often have to be blown up to open passages, and are great for breaking up a pile of adjacent crates using only one shotgun (or higher weapon) blast. Two cautions: First, stay back or the blast will hurt you! Second, blowing a whole stack of crates may release more facehuggers than you want to handle at once; instead, try blowing the crates one at a time and then blowing the barrels. One more trick: when you find an enemy on the other side of a barrel (or barrel-and-crate) barricade, you can either shoot at it from your protected position or wait until it approaches the barrels and kill it by blowing the barrels at the right moment. The latter can save ammo but is riskier because the enemy may turn away at the last moment and avoid the blast; with the barricade gone, it will then come after you. When using crate or barrel-and-crate barricades as a protected shooting position, you may need to blow a crate to create a gap to shoot through, or fire a shot to draw nearby aliens into firing range.