LEVELS 211-263
ANALOGOUS TO ALIEN 3
For a complete PRINT-ME version of walk-throughs for LEVELS 211-263 (black text on white background) CLICK HERE.
Individual PRINT-ME WALK-THROUGHS and PRINT-ME MAPS for single levels are available below at the walk-throughs themselves.
Click here for a PRINT-ME WALK-THROUGH or PRINT-ME MAP for this level.
(1) You don't get much of a break as you start this second section of the game--as soon as you open the entrance door, a company soldier marches up and starts shooting at you! Pulse rifle him and move down the stairs to the main corridor of this level.
(2) Turn left and lob a seismic charge at the first wall recess to your left. This opens a secret U-shaped hallway with 10 derm patches and a single shotshell inside. Just past the shotshell is another secret wall with a pulse rifle behind it. Once you've collected these goods and turned around, a new enemy will be lying in wait for you before you can make it back to the main hallway: 3 young dog aliens have materialized in the U-shaped corridor! Utilize the pulse rifle to clear the way; another company soldier may be waiting for you just as you exit this secret.
(3) Now continue to your left down the primary hallway until you are near the end (you wax another soldier here) and open the right door. This large room has a divider in the middle. You will encounter 4 young dogs inside upon first entering, and another 4 will appear in the near (door) half of the room as soon as you start grabbing powerups in the far half beyond the divider. Don't leave without finding all 9 derm patches and the auto-map lying around on the desks, beds, and floor. There are also 2 med kits within, 1 each on the 2 beds farthest from the door.
(4) Upon exiting, open the doorway opposite you (right in front of you across the hallway). Kill the young dog alien that comes running up the stairs as soon as you enter, then move all the way down and off the stairs to greet a second young dog with an identical welcome (you'll pick up a derm patch en route). Now throw the single switch in the room to turn on the lights. You now have 6 cryotubes to open. The 2 in the center of the room contain a chestburster and ID tag, respectively, as you move away from the switch. The 4 cryotubes against the wall, moving away from the switch, contain nothing, a chestburster, an ID tag, and another 'burster.
(5) Now exit this room and immediately turn left to face the apparent end of the corridor. Behind the wall is a secret room which, when blown, reveals 3 facehuggers, 2 seismic charges, and a shotgun.
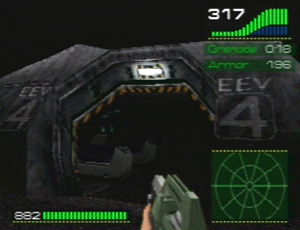
(6) Now do an about-face and start heading toward the other end of the corridor. Enter the only hall to the left that you will encounter and kill the young dog waiting about halfway down. Move forward and down the stairs; you are now entering a large, octagonal room housing the crashed EEV. You will be fired upon as soon as you enter by 4 soldiers; killing each yields a seismic charge, grenade (this powerup only gives you 3, though), or 9mm pistol.
(7) You can now enter the EEV undisturbed. Within are 3 facehuggers (1 or 2 may have already exited and attacked you, depending on how close you got to the EEV while killing the soldiers). There are also 3 cryotubes (the middle one holds an ID tag while the other 2 hide chestbursters), and 200-point body armor--a definite sight for sore eyes. Soon after entering the EEV, a new company soldier appears outside and walks up to the doorway to shoot at you.
(8) After killing him, you are now ready to deal with all the crates in the room. Just behind the stairs you came down are 4 crates; one holds a med kit. Working clockwise from there, you will find: a stack of crates on a lift (don't blow these just yet); a pile of crates in a wall recess (holding 2 facehuggers and a pair of night vision goggles); a small cluster of crates (housing a single 'hugger and the battery you will need to open the exit door); a large stack of crates in another wall recess (contents: 5 facehuggers, a clip, and a second 200-point body armor suit! But watch out--a young dog is hiding behind these crates); and, finally, a stack of crates sitting on a second lift (don't touch these yet!). There are a lot of facehuggers to deal with here; be very careful not to let any get away up the stairs and into the main hallway, or you will be reviving a LOT of enemies as you try to follow and kill the wayward 'huggers! The long-reaching pulse rifle is the weapon of choice for nailing the critters before they can make good their escape, but be especially cautious not to prematurely open other 'hugger-holding crates in the process.
(9) Now go back to the crates on the first lift and, making sure you are standing on the lift, shoot them all open to make the lift rise. At the top you are faced with another stack of crates. Shooting these releases 2 facehuggers and reveals a pair of young dog aliens behind. Be careful--due to the close quarters, it is very easy to get facehugged. Stick with the flame thrower to up your odds of surviving. It is also easy to accidentally drop off the lift, especially if you are using the hard-kicking shotgun. When the smoke clears, you will find that the crates also yielded 5 shotshells and a shotgun. Activate the switch (although it doesn't do anything as far as I can tell) and drop off the lift.
(10) Now head to the other lift and employ the same method to activate it--you'll be rewarded with a pair of derm patches. Here, however, you may have to quickly step off and back onto the lift once the crates are gone to get it moving. Be slow and you may get left behind! At the top of this lift is a short hall; walk down it and blow the secret wall at its end to unleash 3 young dogs. After killing them you can grab the flame thrower and blow another secret wall which will let you out into the main corridor of this level. There may be a soldier or 2 waiting for you.
(11) Once you are in the hall, head left and take an immediate right into a recess with a door at the end. Open the door, enter, and kill 2 young dogs inside.
(12) Now face the door within this room (right in front of you when you first entered) and fire away at it with the pulse rifle. The words "Door powered up" will appear; keep firing and the door will slide up shortly. Inside is a pair of acid boots. Go back into the main room and find the lockers. The right locker in the row of 3 holds night vision goggles, and the middle locker in the row of 5 houses a 'hugger. There are also 5 "shootable" shower stalls here; 2 hide huggers (the cleanest ones you'll ever see!) and the rest are empty.
(13) Now exit this room and stay to your right. Kill the soldier you will meet shortly. You will arrive at the end of the hall and the exit doorway. But wait--there's more! Before activating the battery-operated switch and exiting, launch a seismic charge at the wall to your right, between the spools of wire. Inside this secret are a lot of barrels, 2 facehuggers, a seismic charge, a grenade, a clip, and an adrenaline burst. Blow up the barrels quick to kill the 'huggers and move in to grab the goods. If you've been doing well, you won't even be able to use the 200-point adrenaline burst.
(14) Now you are ready to throw the switch and exit. With an adrenaline burst and 2 body armor suits, you should be one happy camper when you leave this level!
Click here for a PRINT-ME WALK-THROUGH or PRINT-ME MAP for this level.
(1) This level is not terribly difficult because there is body armor right near the exit, allowing you to take your time and plenty of damage but still make your escape armored like a pro. There are 22 company soldiers here, and they can become quite annoying once most have made their appearance and begin to revive repeatedly as you move around; the most convenient thing to do is grenade them all (there are 3 very important powerup-toting exceptions). Exit the entrance doorway and move down the hallway, taking your first right. Grenade the 2 soldiers and explore the 4 rooms down this smaller hall.
(2) In the first pair of rooms you reach, the right holds 2 young dogs, while (left to right) lockers 2 and 3 hide an ID tag, battery, and med kit. The left room holds nothing.
(3) In the second pair of rooms, the right houses a young dog and an ID tag (lying on a desk); the left room also harbors a single dog, and the auto-map and a med kit are lying on a desk.
(4) As you leave this area, 2 new company soldiers materialize at the hallway junction. Kill them and stay right, where you will encounter another soldier around the corner. Take your first left down a short stairway into the dining hall and continue straight across up an identical stairway; kill the pair of soldiers here.
(5) Re-enter the dining hall and turn left; you will shortly encounter 2 soldiers, 1 just up the new stairway and 1 inside the kitchen. Activate the 2 switches on either side of the kitchen doorway and open the door to your right--a soldier awaits his fate on the other side.
(6) Kill him and move back inside the doorway; the middle locker of the trio to the right of the door holds an ID tag.
(7) Now proceed to an identical locker/door combination on the other side of the kitchen; the middle locker (when facing the door) yields a med kit, while the second locker (with the door on your right) holds a facehugger and ID tag.
(8) Now open the door and blow the crates directly in front of you, revealing a battery, facehugger, and med kit. The now-visible door behind the crates is not functional, so turn left down this hallway until you reach more crates and a switch. Activate the switch, blow the crates to reveal another door, and enter. Inside, the first 4 crates you see each hold a 'hugger, and behind those crates 4 young dogs lie in wait. Having dispatched them all, proceed to a second row of crates. These house 2 'huggers, while a single young dog lurks behind. On your way out, make sure you open 2 crates in this room that you probably missed on the way in; one holds a med kit while the other yields a special 10-up derm patch.
(9) Leave this room and stay to your right. As soon as you enter a long hallway, 2 soldiers will attack from a doorway to your left. Grenade them and continue down the long hall. You will pass a door hidden behind some crates on your left (to which you will return in a moment) as you move forward; keep going until you see another soldier near more crates. DO NOT GRENADE THIS SOLDIER and do not blow open these crates yet. Instead, pulse rifle the soldier and grab the grenades he coughs up. He will repeat this performance every time you kill and revive him, allowing you to exit this level with a full count of 20 grenades.
(10) Now backtrack to the crate-hidden door. Blow the crates (a seismic charge and facehugger lie within) and enter the door. Explode the crates directly in front of you and up the stairs; kill the emerging facehugger but don't go up the stairs. As you continue into this room, you will encounter more crates, 4 of which will release facehuggers. Kill 'em all, exit the room, and stay right.
(11) You will enter a room with several desks (don't miss the ID tag on one of them) and 2 switches. DO NOT activate the battery (large) switch just yet; instead, flip the small switch and blow the crates to the left of it to reveal another hall and a pair of night vision goggles.
(12) Activate the goggles and proceed forward. One or 2 dogs will attack before you reach the stairs. At the stairs, kill any reactivated 'huggers at the right-hand wall opening (this is the top of those stairs you ignored in this room earlier) and deal with the second young dog that will be here if he wasn't waiting for you farther back this hallway. Move forward and blow 2 'hugger-holding crates at the top of another stairway. Continue ahead and blow the secret wall you dead-end at. DO NOT GRAB THE BODY ARMOR JUST YET! There is also a clip and a shotshell in this secret hall, which you will be re-approaching from the other end shortly.
(13) Now reverse your route and go back to the battery switch you ignored earlier. Activating it opens the exit doorway and causes 6 company soldiers to materialize just outside the door. There will be 4 on the left and 2 to the right. Stay left out of this room, grenading the soldiers as you go. [BUG! There is one exception--DON'T grenade the second company soldier to emerge from the right. A sequence-specific glitch does not give you credit for all the ID tags you acquire when you play the level in this order, giving you a deficient score for MISSION at the end-of-level ASSESSMENT screen. You will need to revive this soldier and acquire an additional ID tag by killing him before exiting this level. If you are playing at the EASY or MEDIUM settings, you may need to vary your route to find the "right" sequence for this level before you can score the full 100%.]
(14) As you near the end of the hall, be careful NOT to grenade your buddy (the one that coughs up more grenades every time he expires). Use the pulse rifle if in doubt. At the exit doorway, 3 company soldiers emerge. The LAST one out is also a grenade-toter, so just pulse-rifle him. Now you can run up and down this hallway, repeatedly reactivating and killing these 2 soldiers, until your grenades are topped off at 20. [This is also when you will acquire the "missing" ID tag from the now-revived soldier.] NOW blow the crates here that you passed up earlier and kill the 2 facehuggers that emerge (had you blown these crates earlier, you would have revived these 2 'huggers every time you revived the grenade-yielding soldiers).
(15) You are ready to grab the body armor and exit. Open the door across the hall from the exit doorway and blow the secret wall inside. You can now grab the armor, clip, and shotshell.
(16) Move back to the exit door and make good your escape with a maxed-out armor and grenade count.
Click here for a PRINT-ME WALK-THROUGH or PRINT-ME MAP for this level.
(1) This is definitely one of the tougher levels to figure out with all of the sequenced lifts involved. There are also a large number of company soldiers here, as in the last level. It is most convenient to simply grenade (or seismic charge) them all into oblivion. Even though there is only 1 grenade powerup (=5 grenades) on this level, there are lots of grenades available in the next level, and if you don't miss much you will still come out pretty well stocked up.
(2) Start by moving straight down the hallway you begin at to a junction. There are 4 soldiers here; kill them with grenades or seismics. (While near this junction, you may occasionally have a facehugger from the area below you jump up onto the railing or walkway and come after you!)
(3) Turn left and move straight ahead across an open walkway and across a lift platform to a stairway inside a corridor. Kill the soldier that comes up the stairs after you. As soon as you touch the med kit at the bottom of the stairs, 2 doors on either side open, each releasing 2 facehuggers. Kill the 4 'huggers and move forward (there is another med kit behind the right-hand door if you need it). Blow the crates just ahead to get the battery. Keep going until you reach a second stack of crates. These hold 3 facehuggers, 3 derm patches, and the auto-map. There are also 3 more 'huggers lurking behind the crates. Be very careful not to get facehugged in the narrow confines of the hallway.
(4) Having cleared your way, move forward to the switch and activate it. This powers up the lift platform back at the end of this corridor. Now backtrack to the lift, killing 3 newly-materialize soldiers and any revived enemies on the way.
(5) Walk onto the lift to make it rise, and step off it to the RIGHT when it reaches the top. Kill the company soldier here and WAIT for the (now-unoccupied) lift to go back down before proceeding.
(6) Move away from the lift and to a doorway. Opening it unleashes 4 'huggers--kill them, then flip the switch inside. This raises the lift back up; if the lift was not all the way down yet, you are stuck and will have to make a 5-point fall to get back down (sorry--armor's no help here!).
(7) Now move off the lift (you may be battling some revived enemies as you do so) and go straight through the junction mentioned earlier (the one with the 4 soldiers in it) dead ahead to a lift similar to the one you just came down on. Go across it into another corridor and stairway. Touch the derm patch below and 2 doors open, releasing a pair of soldiers (one to your left and a second around the bend just in front of you). Dispatch them and grab the med kit in the room around the bend if you need it. Now move down the unexplored hallway (to your right as you entered this area) until you reach a pile of crates. Each of these 4 crates holds a 'hugger, with 3 more of the critters waiting on the other side. Beware of multiple 'huggings as you deal with this group
(8) Now activate the switch ahead and do an about-face, heading back the way you came. There will be 1 freshly-materialized soldier on your way out in addition to any "revivors." [BUG! Before proceeding, I recommend reversing your route and re-killing all the now-revived facehuggers at the other end of this corridor. The reason for this is that a sequence-related glitch in the coding prevents you from achieving 100% for ALIENS at the MISSION ASSESSMENT screen, even when ALL the aliens in the level are actually killed, simply because the level is played in this particular order. This is probably the most convenient location in the level for topping out your score. On the other 2 difficulty settings, explore alternate routes to find the "correct" sequence.]
(9) Kill all the enemies and step onto the lift to raise it. Get off to your LEFT at the top and kill the 2 soldiers. Once again, WAIT for the lift to go all the way down before proceeding away from it to a door.
(10) Open up and kill the lone soldier within before flipping the switch. This re-raises the lift you just came up on and opens the exit doorway.
(11) Go back to the lift and walk onto it and it will drop down after a few seconds; a company soldier makes a fresh appearance at the bottom. (Again, if you activated the switch in the room prematurely, the lift stays down and you will lose some health points making the painful drop back down.) You may have to re-kill some revived enemies at this point. Now walk off the lift (with the corridor and stairway at your back) and take an immediate right down the open walkway. Walk onto the elevator platform under a gantry to go down.
(12) Blocking your exit from the elevator at the bottom will be a row of crates. Two crates house 'huggers; the best way to deal with them is to shoot a gap--2 crates--in the left end of the row (yielding a derm patch) and move out into the courtyard area. Now you can deal with the remaining crates and the 2 facehuggers from afar (don't worry--you'll receive 2 more derm patches for your trouble). You are ready to activate the switch (which enables the elevator) and blow the remaining crates in the area. The crates will yield a grenade, body armor, and a hypo pack. Grab the hypo pack last and make a beeline back up the elevator.
(13) Kill the new soldier at the top and head full speed to the lift platform that was up the stairs from the derm patch (this would be to your right as you ran back onto the elevator to go up and is in the opposite direction as the soldier you just killed). Run onto the lift and get off to your LEFT at the top. Another newly-appeared soldier will be there to greet you.
(14) Dash ahead onto a new lift platform between 2 switches and it will go down, but try to kill the soldier here first. (These 2 switches, by the way, will re-raise both the other lift platforms if you happen to get stranded by one of these lifts and are lucky enough to be on this section of the walkway when it happens.)
(15) Beware when you hit bottom as your hypo pack has most likely run out. You are standing at the top of a stairway; 4 facehuggers and the exit doorway are below. Be especially careful not to get facehugged in the very narrow confines here; this is especially annoying when it happens so close to the exit door (believe me).
(16) Be sure to grab all 3 derm patches on the stairway before making good your exit.
Click here for a PRINT-ME WALK-THROUGH or PRINT-ME MAP for this level.
(1) There are so many goodies here this is almost a powerup level, but you still have lots of enemies to do away with. I recommend using grenades or seismic charges to kill the company soldiers in areas where you will be retracing your steps, simply for convenience. Enter the level and grenade the 2 soldiers directly ahead.
(2) Directly to your right, just outside the entranceway, is a secret wall hiding a seismic charge. Ignore the door opposite it for now--you won't be able to get in until you are nearly finished with this level.
(3) Move forward and take the first right. Blow the crate and grab the battery. In the room ahead are 3 soldiers; after killing them, grab the clip, derm patch, shotshell, and auto-map. Don't activate the switch (to turn off some fire jets) just yet, because it causes 6 facehuggers to materialize outside the room; leave them for later and you'll only have to kill them once.
(4) Turn right when you return to the primary hallway. There is a door on your right, but ignore it for now to avoid re-killing more enemies later. Kill the soldier ahead by lobbing a grenade over the crates he is hiding behind. Directly behind him (at the corner) is a secret wall, but you will want to put this one on hold for the time being, also. Now move toward the piston lifts. Carefully sidestep in front of the switch to your right to avoid the fire jet and activate the switch to turn on the 2 pistons directly in front of you.
(5) You can now move ahead onto the 2 pistons and hop to your right into a new area of the game. Be careful whenever you are on the pistons as any fall is fatal! There is a soldier waiting when you arrive. Kill him and move ahead.
(6) Take the SECOND right, but don't miss the secret room in the corner ahead where you will find a med kit and seismic charge.
(7) Proceeding down the unexplored hallway, blow the crates on your immediate right. Flip the switch and open the now-exposed door. Shooting the crates yields 2 med kits. Hold on, though--you ain't done yet! Once in this room, face the left wall. You can blow it (plus 2 more dead ahead) to reveal a total of 3 shotshells, 3 flame thrower canisters, 3 pulse rifle magazines, a seismic charge, and a grenade! A single soldier will come after you about now; eliminate him.
(8) If you can still walk with all the goods you are now carrying, move back out and down the hall. Blow the wall just to the left of the fire jets to reveal a very narrow secret area housing 5 facehuggers. Don't worry, though--normally, only 1 or 2 lucky winners survive the blast and need dealing with. Now you can either watch your timing and run past the fire jets or avoid them by walking into the now-revealed wall recess; watch for acid from the 'huggers, though.
(9) Open the door ahead and kill 2 soldiers. Blow the barrels and crates to find a battery and night vision goggles; the exploding barrels will also blow a hole in the wall. But wait--the new wall opening is a trick to get you to leave without all the goods!
(10) Throw a seismic charge at the wall behind the row of crates you opened and inside you'll find, either lying around or inside crates, 2 shotshells, a med kit, 3 flamer canisters, a pulse rifle magazine, a seismic charge, and 2 grenades.
(11) NOW head back to the hole in the wall. In this room you will kill 4 soldiers (one coughs up grenades) before taking your time to grab all 7 derm patches lying around on the tables and desks.
(12) Now approach the far left corner of the room (you will pass a switch to your left) and blow open another secret wall ahead of you and behind a pillar. Within you will find 4 eggs, a seismic charge, and 3 med kits. Activating all 4 switches in the main room will turn off some fire jets, activate another piston lift, power up that door right near the entrance, and open the exit doorway. One switch also causes 2 young dogs to materialize near the hole in the wall that allowed you access to this room.
(13) Dispatch them before opening the door here and killing the grenade-toting company soldier right in front of you. Move forward into the hall. The crate to your immediate right, as well as the 2 just ahead, each contain 1 facehugger.
(14) Continue forward and open the door on your left (after blowing the crates in front and killing the pair of 'huggers that pop out). Grab the battery inside and activate the switch.
(15) Emerge from the room and continue left. The wall on your immediate left can be blown up to uncover a flamer canister, shotgun shell, and night vision goggles (I don't know where on this level you really need the goggles). A company soldier will make an appearance about now; don't keep him waiting! (At this point you can run up and down the hallway to repeatedly resurrect the 2 grenade-carrying soldiers behind you if you are running low on these explosives. This works best if you grenade all the other soldiers in the area as well as the 2 dogs beforehand. And, of course, you can't use a grenade or seismic on the 2 dudes toting the goods if you expect to successfully reanimate them later.)
(16) Now stay left all the way back to the pistons. Two newly-materialized soldiers will come after you across the lifts. After killing them, move straight ahead across the pistons and then right to get to the exit area. Throw the switch to activate the final piston and allow you access to the last part of this level.
(17) Now stay ahead and to your right on the pistons to a very small area. Looks pretty sparse, I know, but behind the secret wall right in front of you lie 6 facehuggers and the prime pickup of this level, the smartgun (Oh, yeah!). Kill the baddies and grab the goody. You are now officially ready to rock!
(18) Ignore the already-activated switch here (function unknown) and stay right on the pistons to get back to the first part of the level and the numerous unopened rooms you left behind. Upon arrival you will have to kill any revived enemies as well as 2 new young dogs.
(19) First, run into the room that had the 3 soldiers in it and activate the switch you left untouched.
(20) When you near the doorway, 6 'huggers attack. Kill them and head for that unopened door right next to the entrance. Behind it are 5 patches and body armor.
(21) Now move back down the hall and open the last door on your right, but be warned: between you and the piston lifts lie 2 freshly-materialized young dogs plus the pair you killed here earlier, and you will probably encounter a couple of them now. Inside the door are 4 eggs and a seismic charge. The wall at the end can be blown up. Careful--out come 2 of the fastest-moving young dog aliens in the game! Two med kits are in this secret room if you need 'em.
(22) Now head back toward the pistons, dealing with any remaining young dogs along the way. Don't forget the untouched secret area in the corner. Within are a seismic charge and 4 crates containing 3 'huggers and a single derm patch; behind the crates lie another facehugger and an adrenaline burst. If you walk over the adrenaline burst and it doesn't disappear then you're doing okay. At this point a newly-appeared young dog may try to get at you across the piston lifts. If so, it is easiest to wait for him here. Otherwise, you will have to seek him out where you found the smartgun and try to kill him without getting 'hugged by one of the facehuggers you left behind.
(23) This done, you can now get yourself and your shiny new smartgun to the exit doorway.
Click here for a PRINT-ME WALK-THROUGH or PRINT-ME MAP for this level.
(1) There are 8 or 9 (yes--it varies) derm patches to grab on this powerup level. Other than that, the prime goods here are 2 body armors, 4 seismic survey charges, and a single grenade. The pulse rifle is the quickest crate-opener due to its long reach and fast firing rate. Hit the ground running and move out of the entranceway. The pair of crates on the left hold a seismic and a shotshell.
(2) Wind your way around to 2 opposite-facing crate-and-barrel barricades. Blow both stacks and grab the goods: on the right are 2 patches, the auto-map (do take the extra second to grab it--this item makes navigation quite a bit easier), and a shotgun shell; to the left are 1 OR 2 derm patches (this seems to vary randomly--the extra patch is there approximately once out of every 3 or 4 loads) and a flame thrower canister. To acquire that extra derm patch, keep reloading this level until it shows up and then try to make a successful circuit.
(3) Now run down the LEFT corridor and blow the next pair of crates (1 on either side) for a derm patch and pulse rifle magazine. Keep moving and ignore a second pair of crates (empty!).
(4) You will want to take your next right but first dash straight ahead past the junction into the very short corridor extension and blow 3 crates for another derm patch, a seismic charge, and the body armor.
(5) Now backtrack slightly to that right turn. Just around the corner and to the right is an opening with 4 crates: one pulse rifle magazine, a derm patch, and a med kit. In the second of the 2 crates you pass on your right as you move forward are night vision goggles, but you don't really need them here and you also don't really have the time.
(6) Bypass the corridor to your right; the 2 crates just past it contain a 9mm pistol and med kit. The next crate (on your left) is empty. Take the next right and blow the crate on your immediate left for another derm patch. If you need grenades or pulse rifle ammo keep moving to the end of this corridor for a single grenade, a pulse rifle, and 2 magazines.
(7) Now dart out of this corridor offshoot and stay right around an inverted U-shaped bend (the crate at the bend holds a med kit, and the one on your immediate left after making the turn holds the final patch).
(8) If you didn't grab the pulse rifle with grenade and magazines back there you, have just enough time to either continue forward for 3 crates holding a flame thrower and 2 fuel canisters or do an about face and then turn left and go straight down to the end for 2 seismic charges, a med kit, and body armor. If you are quick around the corners you can exit with all the derm patches and seismic charges unless you go for the pulse rifle goods instead. Just by way of being complete, if you take the right corridor where the crate-and-barrel barricades are you will reach an empty crate on the right and one holding a med kit farther on down to your left.
Click here for a PRINT-ME WALK-THROUGH or PRINT-ME MAP for this level.
(1) Open the door and head down the first set of steps. An alien handler starts firing at you right away. Kill him, but not with a grenade or seismic charge; he's carrying grenades and you will want him to hang around. By this time another handler will move in from your left--grenade this one unless you are low on pulse rifle ammo since he only coughs up a rifle magazine upon expiring.
(2) Now move down the second set of stairs to floor level and head left (you will activate a chestburster in a canal here which can be ignored until the very end of the level). Shoot the first alien handler you see on the other side of the bridge you arrive at (he's toting more grenades, and if you want to you can lead him back to that first alien handler for convenience) and toss a grenade at the second handler. (At this point, you may wish to run back and forth between here and the entrance area to repeatedly reactivate the alien handlers with the grenades. You will pass that spot on your way to the exit door, and having a cache of grenades waiting for you just before you exit will be pretty convenient.)
(3) Now go across the bridge, ignoring the switch and door to your left for the moment since you need a battery before you can get in here. Now open the door on the other side of the bridge. As soon as you do so, an alien handler appears in the water behind you and starts firing. At the same time, coming for you full steam will be a pair of new enemies: quick-moving adult dog aliens! You will definitely want to toss a grenade at each alien to prevent it from being a nuisance in the future. Avoid hitting the barrels since this will kill them but not permanently and you will end up dealing with them again later on. Once they are dead, you can deal with the water-wading handler. Now detonate the barrels and shoot open the crates in the room. One of the crates in the right corner of the room holds a chestburster; the rest will yield 3 derm patches, a battery, and med kit.
(4) Before blowing open the row of crates toward the left, open the other door in this room. Inside you will encounter a ceiling-dwelling adult dog. The best way to deal with him is to dash away out of the room until he follows, then turn and start firing with the pulse rifle (you will have to aim up) until he drops. This ceiling-hanger is actually pretty slow compared with the warrior variety encountered in previous levels. [PSYCHEDELIC ALIEN HANDLER TRICK: Come back to this area to reactivate this alien. Rather than return to its normal appearance, it will only be visible as an orange splotch on the floor. Aim down and keep shooting to kill it (even walking on it causes damage!) and upon expiring, a red/orange/blue alien handler appears! He will not attack you, but instead walks in a straight line until hitting the nearest obstacle. The alien handler actually looks like what a Predator might see using its infrared vision!] Having killed this dog alien, grab the auto-map and battery within the room and turn your attention to the row of crates in the main room.
(5) Shooting them clears an opening for you but releases 2 'bursters. You can now hop into the water here (it will not hurt you but does slow you down), and stay to your right almost all the way to the end for a grenade. At the second corner there is a chestburster in one of the pipe outlets. He tends to get "stuck"--you can see him on your motion tracker as well as hear him, but you can't actually see the critter to shoot it. Try shooting around with the shotgun while aiming down to kill it. When you grab the grenade, you may reactivate the first alien handler on the level, and if you do he will wander around after you and wind up just about anywhere.
(6) Now work your way back to the room where some revived chestbursters will be waiting for you. Go out and across the bridge and activate the switch and door you passed up earlier. Kill the 2 alien handlers and blow all the crates and barrels; this will release 2 more 'bursters.
(7) Kill them and face the far left wall of the room. Between and below two small lights near the ceiling is what looks like a door. It is. Toss a seismic charge at it and enter. Inside is a cylindrical lift in the UP position with a med kit lying behind it. Face the med kit. Run over it to activate the lift and run out of this area into the main room. On top of the lift and now hot on your tail are 2 adult dogs. Grenade them both and then return to the now-lowered lift for a seismic charge.
(8) Exit this room and head toward the entrance area. You will now want to take your first left. Ahead is another grenade-carrying alien handler emerging from behind some crates and barrels; a second handler will follow shortly. Detonating the barrels and opening the crates releases a single chestburster; I recommend grenading it permanently out of the picture or else it will stand between the only armor on this level and the exit door later on.
(9) Moving forward brings you to another stack of crates and barrels. These hold 2 more 'bursters for which I also recommend the grenade treatment. Opposite them is a row of crates blocking entrance to a room. Shoot them open and grenade the 'burster.
(10) Now enter cautiously. Your mission here is to successfully grenade the 2 adult dogs inside. If you fail and one or more revives, it will pursue you across lifts and through water to get at you later.
(11) This accomplished, head back toward the last stack of crates and barrels you blew to a switch ahead. Activate it to raise a lift panel in the water to your left. Now grab your mask and snorkel and hop in! The lift you land on will rise up even with the one you just activated, allowing you to move forward to another room.
(12) Ignore the next switch (you will use it on the way back) and stay to your right till you dead-end at a large switch panel. Activate it to open the exit door.
(13) Now turn 180 degrees and stay right; prepare to get wet again! Jump right in and stay right to the junction. You have 3 canals to explore--call them LEFT, CENTER, and RIGHT.
(14) The shorty to the LEFT ends at the bridge you crossed earlier and contains nothing (any alien handlers in the vicinity not vaporized earlier will reappear now).
(15) The CENTER waterway leads to a room blocked by a wall of crates. First, kill the chestburster waiting for you in the pipe outlet at the end of this canal. Now stand back and open the crates. They hold 3 or 4 chestbursters (it varies), 2 seismic charges, and night vision goggles. Lying on the floor behind is an adrenaline burst.
(16) The RIGHT canal has a derm patch lying in the middle of it right near the beginning and 2 'bursters hiding in a pair of pipe outlets at the very end.
(17) Having completed your explorations, head back to the room where you jumped into this canal and activate the switch you left untouched. This raises both of the lift panels you used to get here when you first entered the room earlier.
(18) Now move back past the first lift panel switch and head toward the entrance area. Near the beginning, where you encountered the first alien handler, is a canal with an opening right in front of a lift panel. In the water is a chest burster that was activated much earlier but ignored until now. The easiest way to deal with it is to step into the water and onto the lift (which immediately rises). This will allow the chestburster up to floor level where you can dash down the corridor and, turning, grenade it. The purpose of grenading the 'bursters is to have an enemy- and acid-free path between the suit of body armor near here and the exit.
(19) Before grabbing the armor, though, you have a few more chestbursters to kill. Stay to your left around this canal until you reach the exit door (the hall leading to it is dead ahead, with the canal to your left, if you stand with your back to the second set of stairs leading down from the entrance doorway). Shoot the five crates one at a time; 4 contain chestbursters which require the grenade treatment.
(20) This done, move back to the lift where you let the chestburster up, jump in, and grab the body armor at the end of this canal.
(21) Go back to the lift to get out and make your exit with a full 200 armor points.
Click here for a PRINT-ME WALK-THROUGH or PRINT-ME MAP for this level.
(1) This is one of the more fun levels of the game, with a great deal of variety to it. However, that does not mean it is easy: there are NO grenades available here, so you will want to conserve them--though there are some grenades on the subsequent powerup level.
(2) Open the entrance door and proceed. To your right you will see a synthetic standing on a pedestal lift within a sunken courtyard. This humanoid will drop a smartgun magazine every time he dies. Wax him and turn right; now move very cautiously into the room ahead. Shoot the egg right in front. DO NOT grab the battery on the central table as the consequences would be dire. There are 2 eggs in alcoves to your left and right, and you have to walk around carefully in order to get a shot at them without causing them to release the facehuggers they contain. Destroy a fourth egg on the opposite side of the table and you are ready to get the battery. See the 4 adult dog aliens in the cages? Touch the battery and the gates drop! What you want to do is back up into the battery. As soon as the gates open, dash forward past the entrance doorway and turn around. Any dogs following you will have to move down the narrow walkway, making them fairly easy targets for grenades. Not all the adult dogs will follow at once, so you will have to creep forward until you see them show up on your motion tracker. You want to be certain that you have vaporized them since you will be returning to this area repeatedly. This done, move back to the room. Get the auto-map and med kit on the table and activate the 2 switches.
(3) Do an about-face and move down the walkway, taking the first right (in front of the entrance doorway). The synthetic ahead doesn't drop a powerup when he dies, so use a seismic charge or grenade on him. Ahead and to the right you will see another synthetic on a pedestal lift. Like his twin brother, this one also drops a smartgun magazine upon being killed, so just use the pulse rifle or smartgun on him.
(4) Now turn around and stay to your right. Proceed to a stairway with a synthetic waiting on the other side. Use the pulse rifle or smartgun on him until he gives up his smartgun. You can now run back and forth between this synthetic and the ones on the lifts, repeatedly killing them and making them drop their smartgun powerups. When you have topped off your smartgun and have dropped a couple of magazines on each of the lifts, grenade the 2 lift-dwelling synthetics so they are not a nuisance later.
(5) Now head back to the stairs with the synthetic that drops the smartgun and enter. Don't grenade or seismic this guy since you will be in need of more ammo on your way out. Go down the other side of the stairs and an adult dog comes after you. Smartgun him and proceed to the end of the corridor. Opposite the door is a secret wall; blow it and you find a med kit and seismic charge.
(6) Now open the door. Within are 5 adult dog aliens. You can kill some by blowing up the barrels; the rest will require smartgunning. Work your way to the far end of the room and flip the pair of switches.
(7) Head out, but before leaving open the secret room here. It is behind the wall to your right when you first enter. Inside are 5 eggs, a med kit, a seismic charge, and a pulse rifle magazine.
(8) You can now leave, although some of the adult dogs may have revived and the one you killed outside the room will definitely be waiting for you. Exit and use a seismic charge on the synthetic on your way out. Turn down the walkway right in front of the entrance door. You will reach a series of bends in the corridor as well as some stairs. Open the crates you encounter along the way for a pair of med kits, a battery, and 3 derm patches. At the bottom of the last stairs another adult dog is waiting for you. Use a grenade on this one.
(9) Now move forward to an open area with numerous furnaces visible at the top of some steps. Shoot the nearest eggs up here and the 2 closest adult dogs, but do not explore any more here just yet. Go back down the steps and, facing the wall to your left, launch a seismic charge at it.
(10) This is probably the largest secret area in the game. Just inside are 2 more adult dog aliens needing smartgunning. Continue forward into the pedestal area and kill the 2 remaining adult dogs.
(11) Activate the first switch (by the single pedestal) and move to the switch between the other 2 pedestals. As soon as you activate it, a section of the catwalk behind you dividing the 2 sunken courtyard areas drops. Quickly run over it into the next area.
(12) There are 2 adult dogs here to be killed. If one or both ran across the lift when you dropped it, you will have to deal with them first and then drop the lift for another try. At the end of this new courtyard is a med kit and switch. Activate the switch to drop the catwalk section back down and run back quick--this is one of the fastest lifts in the game. Upon your return, you may have some reanimated adult dogs to deal with.
(13) Now, with your back to the catwalk dividing the 2 courtyards, face the wall between the single and the double pedestals. Throw a seismic charge to open the secret. Within lie 2 facehuggers and a pair of shotshells. Another seismic at the back of this room reveals 3 huggers, 1 seismic charge, and another shotshell. But wait--there's more! One more charge to the rear wall of this room unleashes an adult dog. After dealing with him you can grab the 2 pulse rifle magazines he was guarding.
(14) There is one more secret here. Approach the secret wall you blew to access this whole area. With the opening off your right, throw a charge at the brownish (not greenish) wall in front of you. An adult dog lies within, as do a pulse rifle and seismic charge.
(15) You can now proceed to lower the pedestal lifts and move on to the furnace area. To drop the far pedestal, face the left or "West" side of it (in terms of your auto-map orientation) and simply walk up to it. You should find a stack of smartgun magazines (from repeatedly killing the synthetic perched here) and a med kit. The next lift drops in a similar manner. Stand beside the switch that activates the catwalk lift between the 2 courtyards with the wall at your back and the switch to your left, facing the pedestal. Walk up to the nearest side and down it comes. The only powerup here is a pair of night vision goggles. To access the single pedestal, simply run between the pair you just activated (you will hear the sound of a lift moving) and then dash to the lift and grab the body armor and smartgun magazines waiting for you. You can ride any of the pedestals back up for a bird's eye view of the surrounding area and drop back off without taking any damage!
(16) Now head back for the furnace area, dealing with any revived adult dogs as you go. The 2 dogs you killed here earlier will be revived, and a third lurks to your right. Work your way carefully through the area, watching for eggs and staying as far as possible from the furnaces. A close encounter with the latter drops your health 5 points! Make sure you get all the eggs as you move toward the far right corner.
(17) Blow the secret wall (again, the brownish section) to access a doorway into the final room prior to the exit area. Two adult dogs will charge you as soon as the door lifts. Kill them and move inside.
(18) As soon as you activate the switch to your right, 3 facehuggers dart out of wall recesses to your right and a door to your left opens to release 3 more. Try to avoid being facehugged as you will be assaulted from both sides. Having survived, enter the new room for 2 med kits and a seismic charge.
(19) Now throw the switch opposite the first one to open the exit door. Kill the pair of 'huggers that pop out from the wall behind you and you're on your way out.
Click here for a PRINT-ME WALK-THROUGH or PRINT-ME MAP for this level.
(1) This level is identical to the previous powerup level. This time, though, you start at what was the exit door in the other level.
(2) Run straight forward past another corridor on the right and blow the left crate to get the auto-map and a med kit. Keep moving: the next 2 crates hold grenades.
(3) Reverse your route and move down the corridor you skipped earlier (the crate to the right is empty). Straight ahead is body armor and 2 clips, but more body armor is available closer to the other powerups so stay left to a barrier of crates. Blow them all and grab the 5 derm patches; the single crate in front of the barrier holds a shotshell.
(4) A single seismic charge and 2 shotgun shells are at the end of the short corridor to your left; the crate you pass on your way yields a med kit.
(5) Go back and turn left where the derm patches were. The right crate holds a shotshell and the left crate a derm patch and med kit. Turn left past that last one and blow the 2 crates ahead for another derm patch and (some of the time) a smartgun.
(6) Reverse your route and stay left for a single derm patch crate and, in a small alcove to the left just past it, a hypo pack and body armor.
(7) Keep going past the alcove. If you need flame thrower fuel, there are 3 canisters plus a flamer to the right when you hit the T junction. Turn left instead and the next 3 crates hold a med kit, a pulse rifle clip, and nothing. You won't get this far, but the next 2 yield a shotgun and night vision goggles. If you are pretty low on pulse rifle ammo you can keep moving forward after grabbing the grenades to the next 3 crates for a pulse rifle and 2 magazines; the fourth crate holds a med kit. The section of corridor between the last junction and the exit door holds 3 crates. The first 2, right next to each other, hold 1 shotshell and 1 smartgun magazine each. The last crate, a little short of the exit door, contains an adrenaline burst. Adjust your route for what you need most.
Click here for a PRINT-ME WALK-THROUGH or PRINT-ME MAP for this level.
(1) Figuring out the switches on this level makes it one of the hardest in the game. Other than that, there are really no secrets. Open the door to each room and explore it--that's all there is to it. One very important note: for some reason, the adult dog aliens encountered on this level are several times harder to kill than those anywhere else in the game. It will require 26 direct shotgun blasts or 22 pulse rifle bursts. Use a grenade or seismic charge on each adult dog to kill it quickly and to prevent its return when you retrace your route.
(2) Now to the level itself: the room you start in holds 2 derm patches, a shotshell, and night vision goggles.
(3) Move out the door and you are looking down the large, primary corridor of the level. You will reach 3 rooms to your left with a very short corresponding corridor across the hall from each. At the first of these corridors (to your right) an adult dog alien may charge you. Grenade it and continue. Don't miss the derm patch in this corridor as well as the next one. Of the 3 rooms, the second is the only one open right now. It holds 4 patches.
(4) Near the end of the main hall, grab the derm patch and take the third corridor. Turn right (there is another derm patch here) and go all the way down this long secondary corridor (parallel to and beside the main hallway) until it turns left. There may be an adult dog along the way. There are 2 derm patches just short of the T junction you will reach shortly and 1 in the junction itself.
(5) Explore left and you will find another patch at a closed door.
(6) Explore right and you will end at a pair of closed doors; on the way you will find a pulse rifle magazine (activate your night vision goggles here), an adult dog, and 3 derm patches. In the only open room you will find here (on your left) are 3 flame thrower canisters and a shotgun shell.
(7) Now reverse your route to the point where you first entered the secondary corridor. Work your way forward by following the "bread crumb" trail of 5 derm patches (ignore the part of the corridor that goes around a room to your left for now). You end up at a T junction.
(8) Turn to your right and move ahead, picking up 2 more patches. Ignore the left corridor you reach in a moment and continue to the end of this one. Waiting for you there are an adult dog, battery, med kit, and pulse rifle magazine.
(9) Now turn around and stay right, entering the corridor you ignored a moment ago and grabbing the 4 derm patches and flamer canister on the way. You may have to kill an adult dog first, though.
(10) Exit VERY carefully. There are an egg and infected human just outside the end of the corridor and if you are not cautious you will release a facehugger or chestburster. As soon as you leave this corridor, a door closes behind you at the nearest junction and the words "Door activated" appear. Now enter the large switch room, pulse rifling all the eggs and infected humans as you go. Also to be found in this cave-like room are 3 derm patches, a flame thrower and extra canister, and shotgun shell. At the far end is a short corridor with a battery at the entrance and, if you didn't kill one just prior to entering this room, an adult dog at the end (by a closed door and a med kit). Kill the dog now or he may escape when you open the doors, leaving you with a deficient score for ALIENS at the MISSION ASSESSMENT screen. Now for the switches: Starting from where you FIRST enter this room, there are 3 switches to your right and 2 to your left. The 3 on the right we'll call switches 1, 2, and 3 (with 1 being the closest to you and 3 the farthest); the 2 on the left we'll call switches 4 (next to the flame thrower) and 5 (by the shotshell). NOW ACTIVATE SWITCHES 1, 3, 4, 2, AND 5 IN THAT ORDER. You have just opened ALL the remaining rooms on this level.
(11) Now to explore them. Go down the far corridor (the one past switch 3, that had the battery at its mouth); there will be a new adult dog at the end requiring a grenade. Move forward, passing the single open room you explored earlier. As you near the end of the very dark corridor just beyond, you'll see another adult dog appear on your motion tracker. Grenade him and stay right into the room he just vacated. Within are a derm patch, shotgun and shell, and acid vest.
(12) Exit and stay right; just past a corridor on your left is another opened room on the left side holding flame thrower fuel and a smartgun.
(13) Exit this room and stay left (continuing in the direction you were headed when you reached this room). You will end up at yet another T junction, where another dog will attempt to ambush you. Turn right to grab the patch and then continue left. Another adult dog is ahead; after eliminating him take your first right. An adult dog will attack. After killing him, you will find a pulse rifle magazine on your immediate right in a very small recess and a shotshell and opened room (the source of that last dog) to your left. The room contains another shotshell, night vision goggles, and the auto-map (better late then never!).
(14) Come out of this very small room and move straight forward to the end of this hall for a derm patch and shotgun shell. You are now only a few feet from the next room you want to explore, but since the door right in front of you is closed you will have to backtrack a ways to get to it. Go back down the hall you are in and turn left just after you pass the very small room. Now stay right from here for quite a ways (skip past the 1 open room you encounter). You will pass the 3 short corridors (connecting the primary and secondary hallways) to your left and eventually arrive at a T junction. Turn left. There is an open room on your immediate left, and out will charge another adult dog. Just past the room is the continuation of the corridor and another dog. Kill them both and examine the contents of the room: derm patch, 2 flamer canisters, shotshell, and pulse rifle mag.
(15) Now backtrack to the 3 short connecting corridors. Only the third one (in this case, the first you will reach) is open. Go through it into the main hall and carefully approach the room it faces (room number 3). Inside is another adult dog; if you approach cautiously, you can lob a grenade at it for an easy kill before it is activated. Grab the 2 grenades (running low, were you?) and body armor and proceed to room number 1.
(16) Within are another dog, a seismic charge, and an adrenaline burst.
(17) You have now fully explored all the rooms in the level. However, you did not open all the hallway doors as your mission requires. A quick run back to the switch room, activate a few panels, and you can exit. To wend your way back to the switch room from here, simply go to the other end of the primary corridor and go through the short access corridor you came in through. Now all you do is stay RIGHT all the way back. ACTIVATE SWITCHES 1, 3, AND 5 IN THAT ORDER.
(18) Go back out the way you came in and just stay left all the way to the entrance/exit room. Activate the switch to open the exit and you are done. [BUG! There appears to be a sequence-specific bug on this level. If you have trouble achieving 100% for ALIENS at the end-of-level ASSESSMENT screen--even though you darn well DID kill them all--try reviving and re-killing an extra facehugger or two in the switch room (you may want to deliberately cause 1 or 2 eggs to release their contents in order to accomplish this). If you are playing at the EASY or MEDIUM difficulty settings and the problem persists, follow alternate routes to determine the "proper" order for dispatching the aliens.]
Click here for a PRINT-ME WALK-THROUGH or PRINT-ME MAP for this level.
(1) This level is significantly larger than the last lair. You enter at the base of a large square area with 4 equally-spaced pillars; the queen is in a rectangular area ahead and to your right jutting out from the main square. Use a zigzag pattern and work the area methodically to cover all the enemies and powerups. It also seems best to kill enemies and grab pickups when you see them, even if you have to deviate from your intended route somewhat in order to do so. As soon as you open the entrance door 2 facehuggers perform an assault. Your only hope to escape without damage is to instantly exit the entrance room and deal with them in the open where you have room to back up.
(2) The most efficient way to proceed now will be to explore the area around the 2 pillars to your left first. In the "lower left" corner of this square area (as viewed on the map) are a med kit and flamer fuel if you need either. Now move forward, zigzagging as you explore the 2 left pillars. There is a pulse rifle magazine ahead, so I suggest using this weapon until you reach it. Methodically kill all the 'huggers and eggs. By the second pillar lie 2 derm patches.
(3) When you hit the far wall, work your way along it. Two derm patches, the pulse rifle magazine (don't grab it just yet!), a med kit, and flamer canister will be found here.
(4) Now stay left and explore to the left of the queen (your left--not hers), being careful not to prematurely disturb her by getting too close or hitting her with stray weapons fire. En route you will encounter a derm patch, med kit, adrenaline burst, and grenade.
(5) Retrace your route back to the pulse rifle magazine and grab it.
(6) Now explore the 2 remaining pillars, heading back toward the wall the entrance door is in. Switch to the shotgun here since most of the remaining ammo ahead is for this weapon. Don't miss the 2 patches by the first pillar and another patch plus a flamer canister by the second.
(7) In the "lower right" corner of the square is a shotgun. Grab it and turn around. Now move ahead along the wall. You will reach a corner with 2 eggs. Toast them and make sure you get the egg and derm patch ahead of you out in the open (approximately halfway between the queen and the "upper right" pillar).
(8) Now enter the area to the right of the queen. Along the right wall are 4 shotshells, and in the exit alcove (ahead and to your right) lies a med kit guarded by a trio of eggs and 2 'huggers. Near the pillar by the queen are a smartgun magazine, grenade, and pulse rifle magazine--don't even try to get these yet! Be very careful shooting the egg right near the queen or you may hit her. Also try to shoot any facehuggers near the exit area so that you will not have to walk over them in order to exit.
(9) With all the other enemies dead, you are now ready for the queen. Prepare to back into the exit alcove and shoot at the queen. She is not a particularly hard target so I recommend using just enough grenades so that, with the 2 grenade powerups (=10 grenades) available on this level you still can exit with 20 grenades total (assuming you had more than 10 grenades stocked up from previous levels). Shoot her once or twice to cause her to detach from the ovipositor and back rapidly into the exit alcove. The queen cannot reach you in here, so take your time and make sure of your shots. First launch as many grenades as you have decided to use and then switch to the smartgun. Keep in mind that there is 1 smartgun magazine available after you kill the queen, and that the "rounding trick" is in effect: if you have 800 bullets left the powerup knocks you up to 900, but if you have 801 bullets left it rounds your counter up to 999! At the appropriate time, if the queen is still alive, switch to the pulse rifle and finish her. For both weapons, INDIVIDUAL bursts rather than full auto (just holding the fire button down) seem more effective. Once the queen dies, the exit door opens.
(10) Run out to grab the powerups by the queen and make your exit, watching for any revived facehuggers.